Patent No. GB2627316
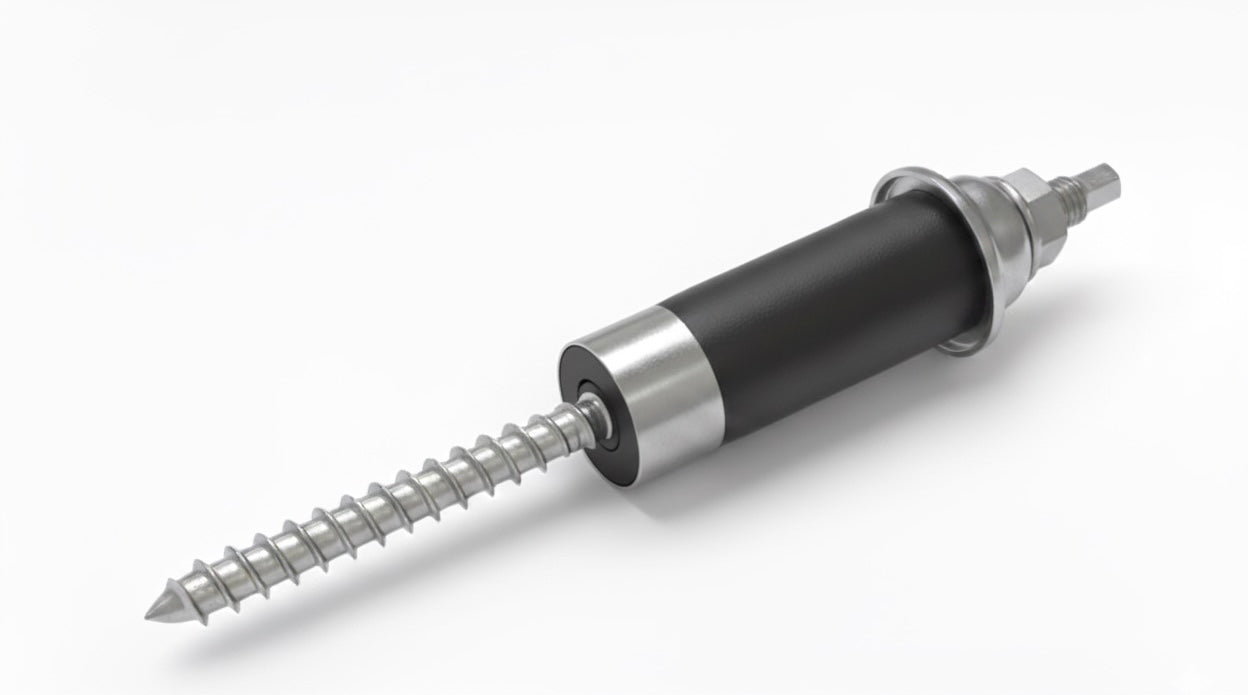
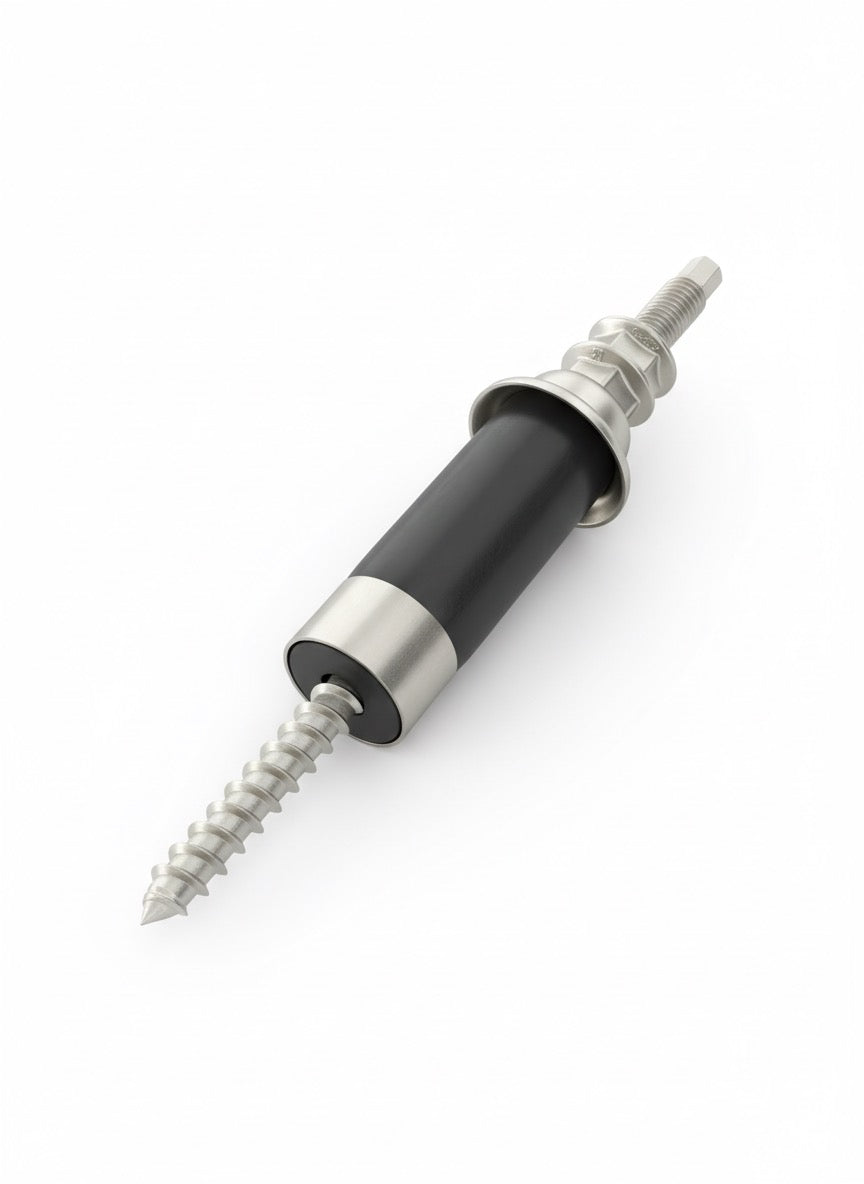
Understand How The SolVe Mount Works
Sealed by expansion. Simply tighten a nut and it creates a perfect IPx8 rated seal every time. Without putting downward pressure on the roof covering.
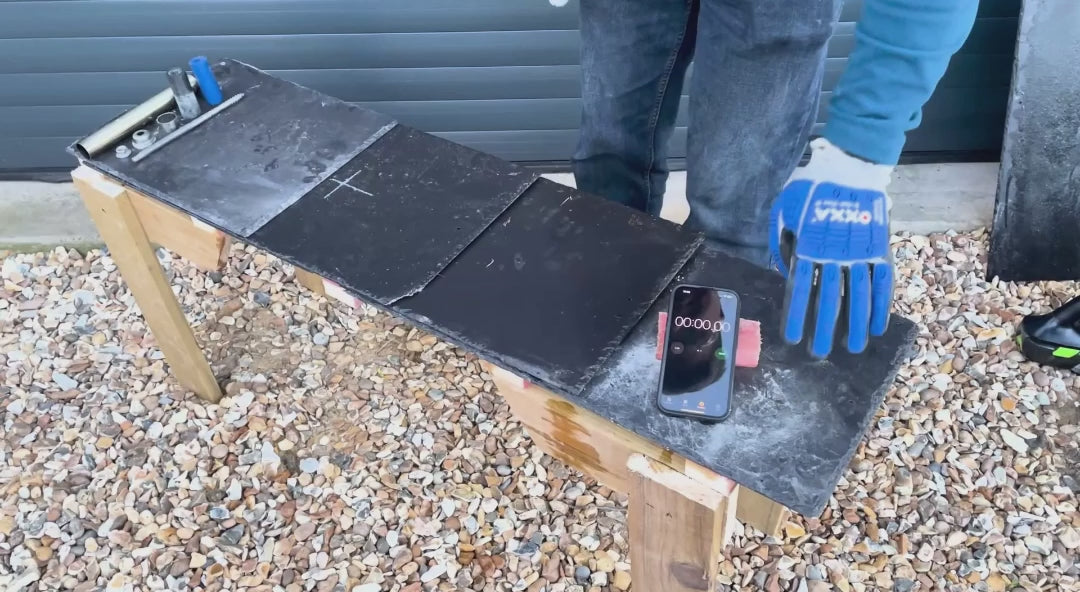
Installed in 90 seconds
Fit & Forget
No removing or grinding slates/tiles required
Reduces risk of damage
Watertight <1.5m depth
20 Year Warranty
Simple repeatable process
Box of 20 weighs 3.5kg
Solar Array Layout Planner
- Wind/Snow Load Calculations
- Key Measurements
- Bill of Materials
Solve Mounts MCS Certificate
SolVe Roof Mounting Summary
Above and Below Veiw
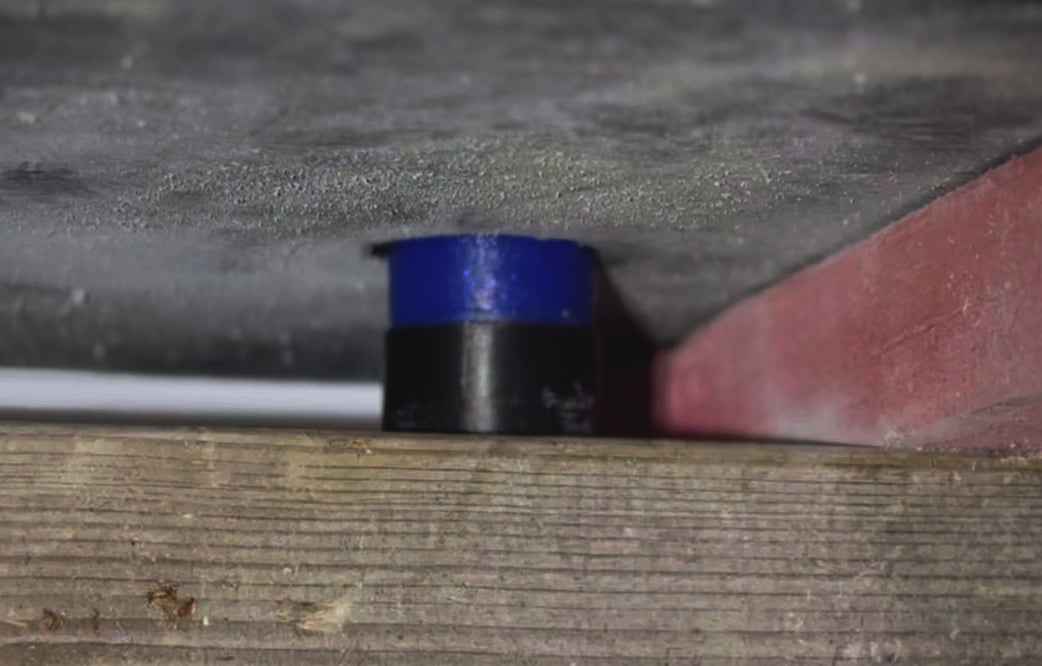
- Expansion starts below the roof covering forming a small bulge as the nut is tightened.
- The expansion continues higher within the slate or tile creating a formidable seal.
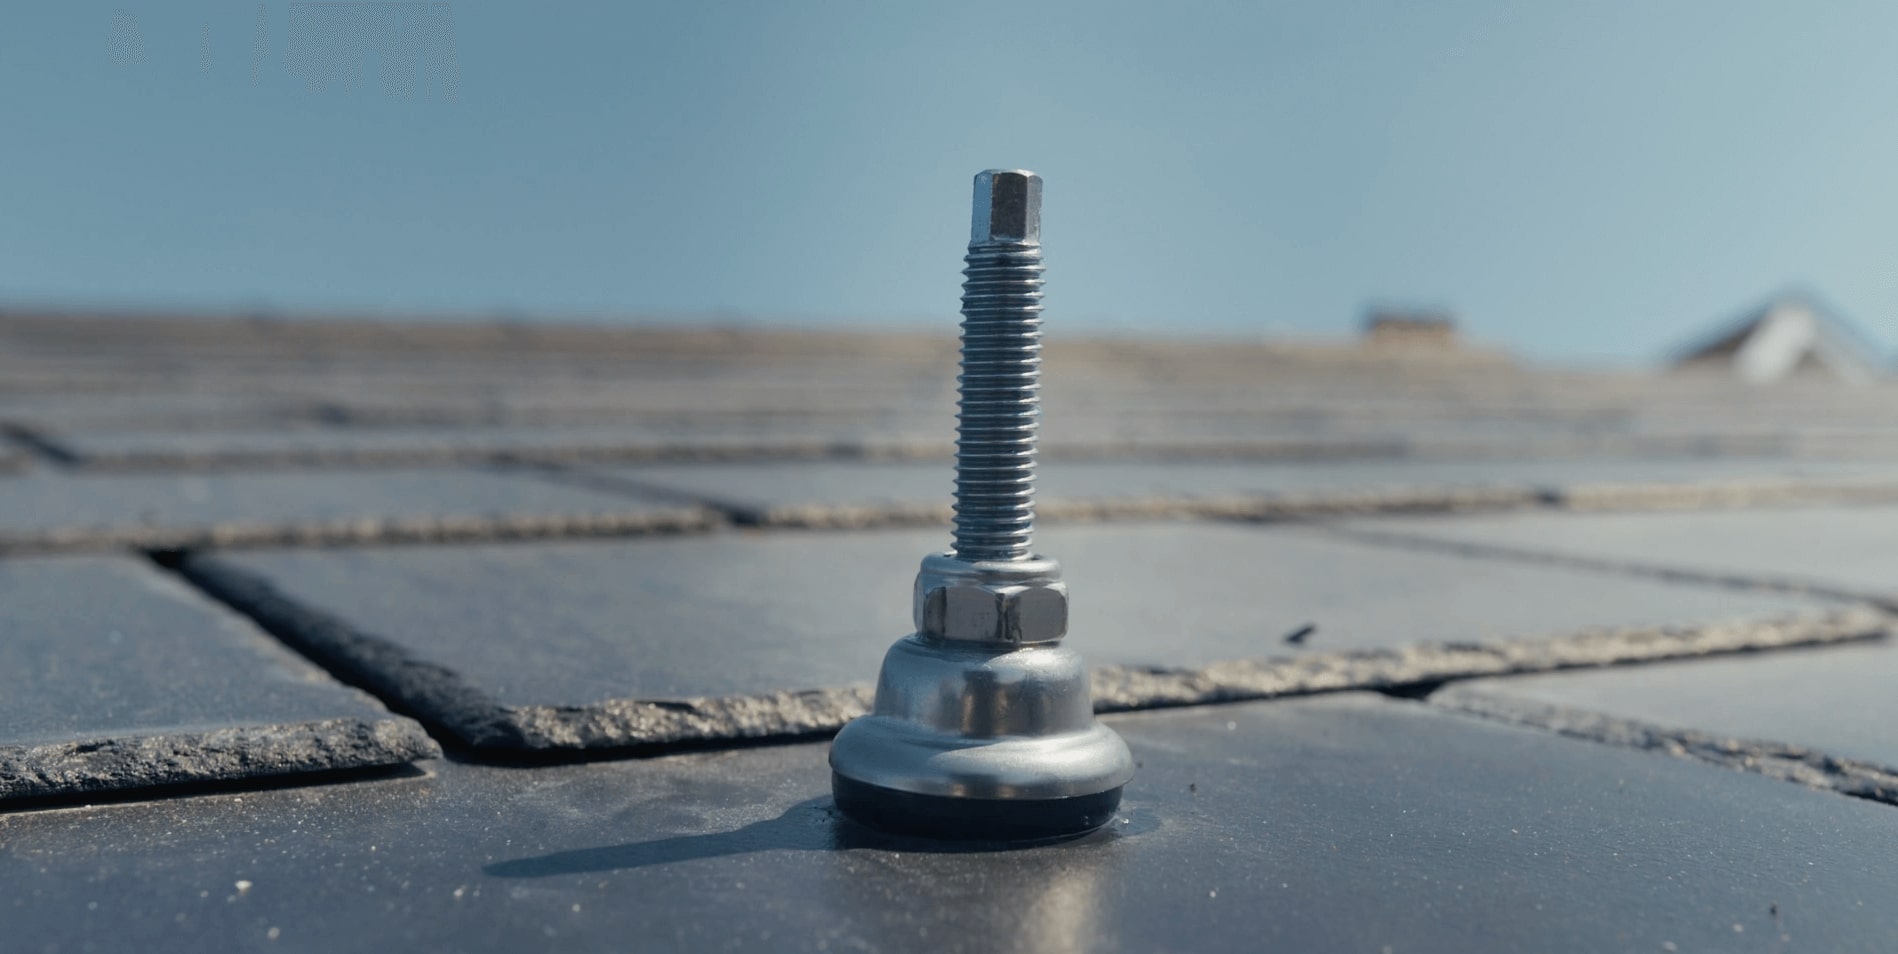
- No downward pressure on the slates or tiles. Ensure the cap does not touch the roof covering.
- A seal is created above, below and within the roof covering.
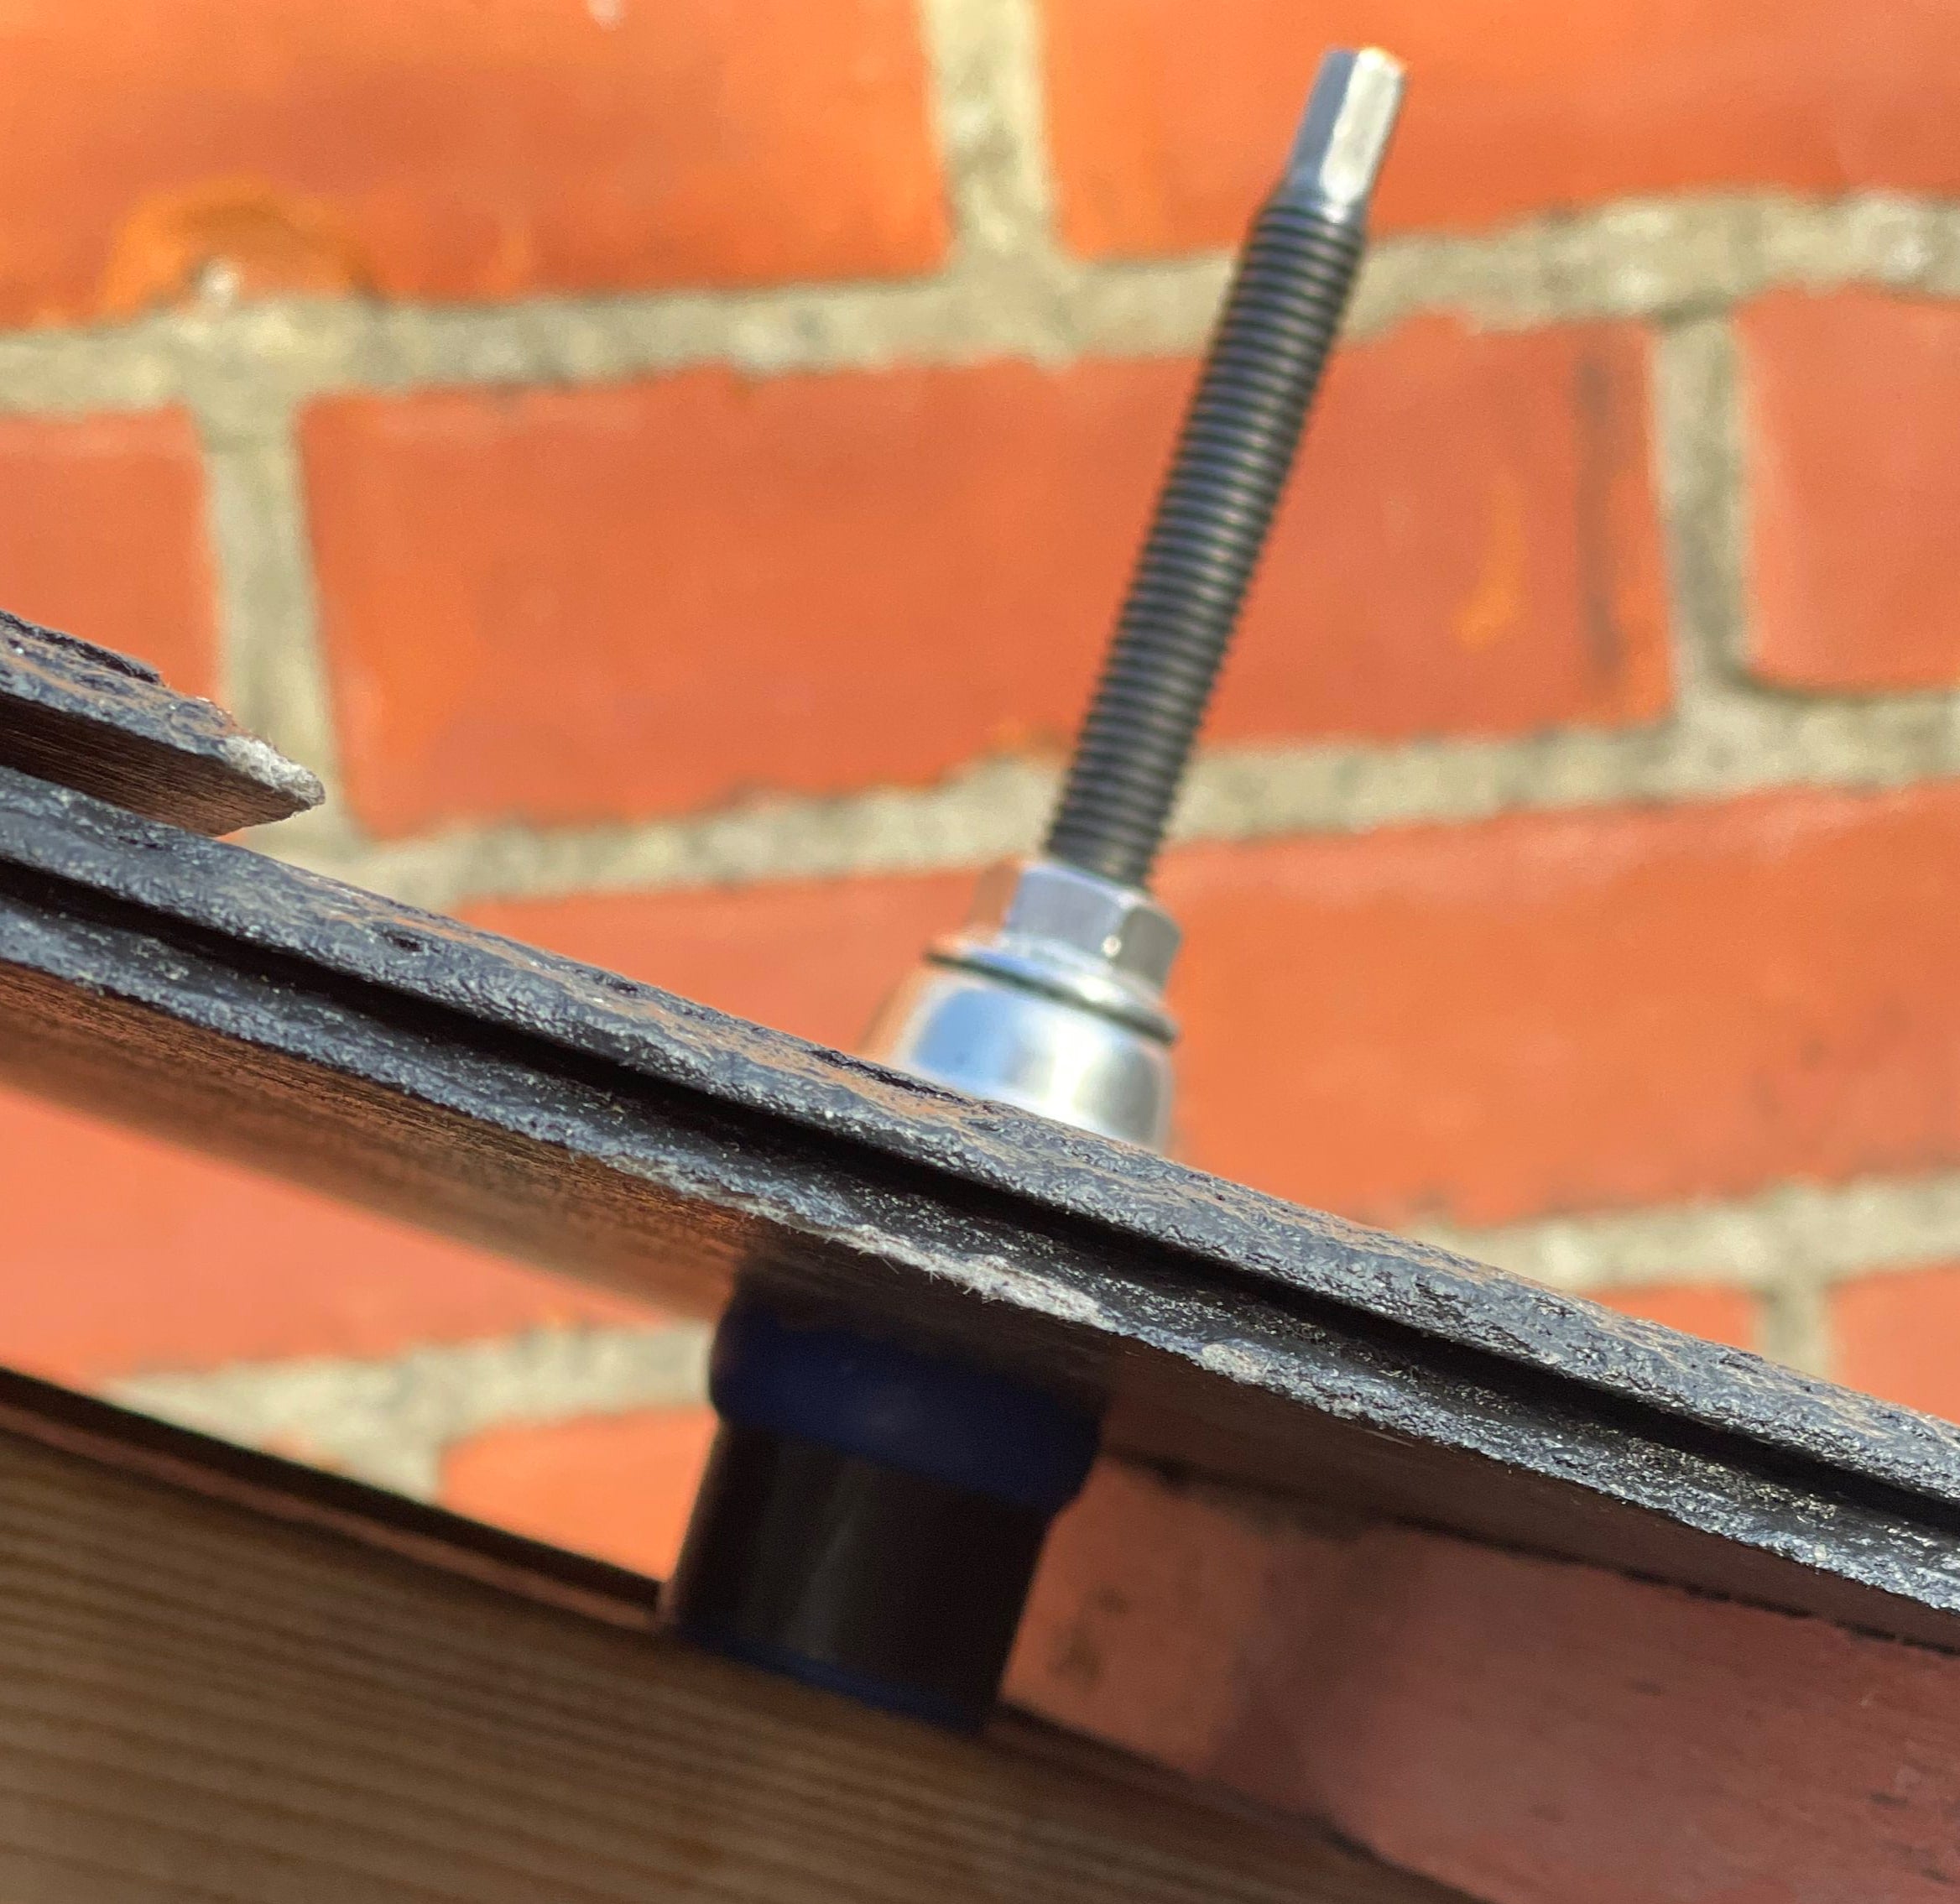
Below
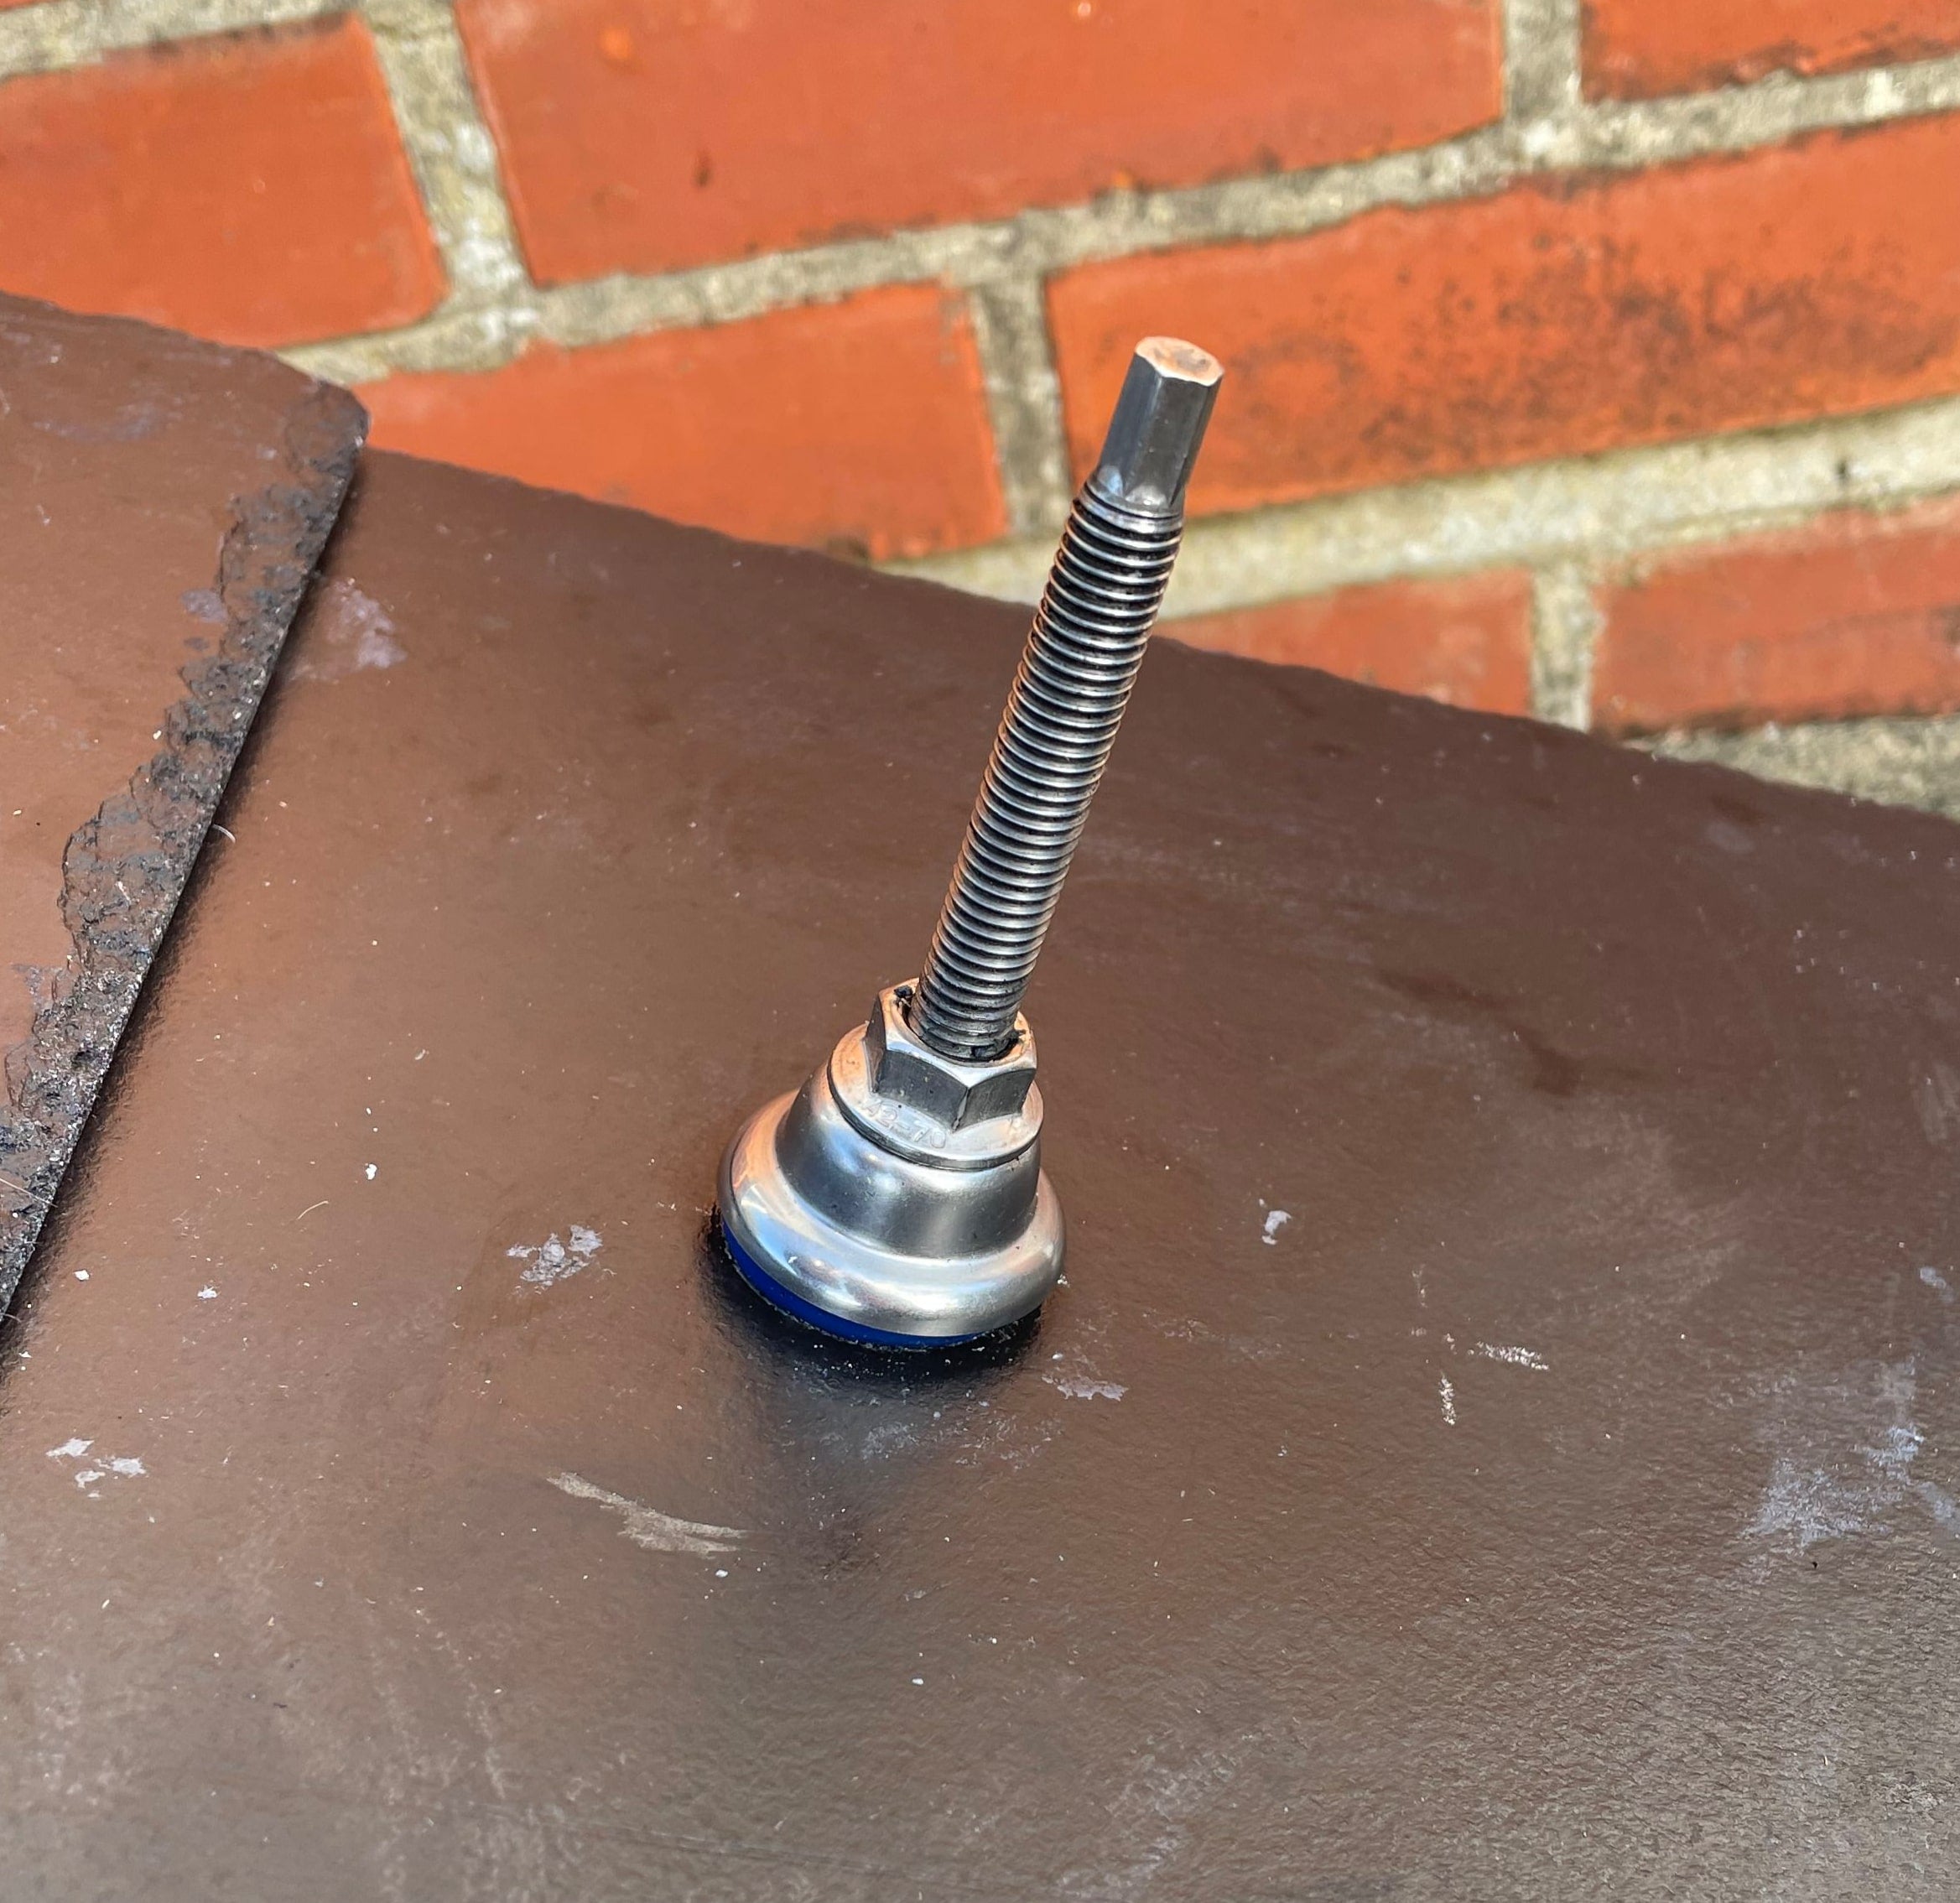
Above
20 year product warranty
How Does It Work?
1. Focus on quality components
Our M10 bolt is made from marine grade A4 316 stainless steel. The alloy is typically used in marine and medical environments where long term durability is crucial.
Our propietary seal is our secret sauce. Vitually unshrinkable/incompressible meaning any compression of the seal results in expansion elsewhere, along with age tests (ASTM D395) showing our seal will likely outlive the roof it's installed on. (150+ years).
It will not breakdown for 500+ years therefore will not cause microplastic pollution and harm the environment. Protected from UV by our 316 stainless steel cap. Perfectly seals the roof covering and membrane in one motion.
2. Ease of use - standardised process
We have made it as easy as possible to install and get a consistent - high quality installation, whether its your new apprentice or seasoned pro doing the install.
Cut - Pre drill - Fix. 3 repetitive motions and the mount is installed.
Our drill guide (one per box) makes pre drilling easy, simply drop in the DG and drill through the hole.
Easily fix any missed holes with a SolVe Fix - simply insert a solve fix, tigten the nut and the hole will be perfectly sealed in the same way, by expansion the depth of the roof covering.
3. How does it seal the roof covering?
Sealing by expansion not compression onto the roof covering.
The slow motion video of an early prototype below shows what happens to our seal when the cap moves down the bolt.
From the base of the seal working upwards.
1. A bulge between the collar and the bottom of the roof covering slowly appears, the collar supports and provides the seal with rigidity - containing the seal where we don't need it to expand. This is an important section and our last line of defence.
2. The expansion continues upwards - there will be a gap between the seal and the edge of the roof covering hole depending on how central you have installed the bolt. (Tip: Use the drill guide provided - always in the centre and at the correct angle). The seal will fill this gap, pressing against the inside of the roof covering - forming another seal equal to the thickness of the roof covering.
3. The roof covering acts like our collar from step 1. Containing the expansion which continues higher - forming a small bulge on top of the roof covering - protected by our cap. This is our first line of defence.
*Note - the cap shouldn't touch the roof covering.
In order for our roof mounting to lose water tightness - all 3 of these seals will have to fail at the same time and for long enough to stop the seal recovering/refilling the gap.
SolVe Seal Installation
SolVe Seal Base
4. No downward force on the roof covering
MCS 012 states that no downward force can be applied onto the roof covering to form the primary seal.
A diamond hole saw is used to make a clean hole in the roof covering, slightly larger than our seal diameter. This ensures that no downward force is transferred into the roof covering.
A circular hole was chosen due to a rectangular hole being more prone to cracking than a circular hole, increasing the stress on the slate/tile.
"Rectangular holes are more susceptible to cracking than circular holes due to higher stress concentrations at their corners. This is supported by the study "Effect of Stress Concentration on Various Shaped Hole Having Similar Cross Section Area," Source: IJARSE
5. Fast, Reliable & Lightweight solar roof mounting
Installed in 90 seconds. Minimal components, reducing the weight by 80%+. Repeatable process so you will become faster the more you use them.
The time it takes to strip 3-4 slates or interlocking tiles for each roof mount can be significant - especially when many solar roof mountings are required or grinding is required so the tile sits flush to prevent wind uplift. When tiles can't be moved - theres no reliable way of installing (until now!).
Slates, especially older slates and tiles, are prone to disintegrating/cracking when moved - our diamond cut hole approach solves this issue. No more moving the last few slates at 3.37pm on a Friday only for them all the crack!
One of the challenges solar installers face is carrying lots of heavy equipment onto a roof, our lightweight mountings and easy to carry boxes will be a pleasant change.
The 3.5 kg box has all the components you need to install 20 mountings.
If you have any questions, please contact info@solveshop.co.uk.
SolVe Products